In terms of reaching Southeast Asia, Shopee is a great platform of choice to sell your items. Countries included in its reach are the Philippines, Singapore, Taiwan, Thailand, Malaysia, and Vietnam to name a few.
Sellers from China and Hong Kong can also get their products across to other Southeast Asia countries.
If you are interested in selling on Shopee, then you have come to the right place. We’ll be discussing and laying the steps you need to follow to sell on Shopee. We’ll also be discussing several things that may help you out when you sell on Shopee.
Why You Should Sell on Shopee
Before we explain the actual process of selling on Shopee, let’s delve on the reasons why you should choose Shopee as your online selling platform.
A Social Platform
At its core, Shopee is a social platform. This means that the community is very in tune with the various shops on the platform. Thus, the reputation of a store is as important – if not more so – than the actual items being sold there. The more followers and fans you get with your store, the better the experience will be all around.
Financially Free
Shopee has everything it takes for it to be a financially free experience. There are no commission or listing fees in Shopee. This will help in alleviating some of the financial burden. Store owners will be able to choose native advertising and buy ads if they so desire to though.
Growth Potential
The potential for growth on Shopee is very fast. If the stars align, it may feel like there is a rocket strapped to your back. In Shopee’s very first year, the Gross Merchandise Value (GMV) almost reached USD $2 billion in its value.
Logistics
Signing up for Shopee will also mean that you have access to their shipping and logistics services. As they are top platforms, their logistics and delivery services are quite fast. The reliability will mean you don’t need to focus on these. Instead, you can focus on growing your store.
Set Up is a Breeze
Finally and most importantly for newcomers, setting up a shop on Shopee is a breeze. The first thing you need to know is that you won’t need any money to set up your website on Shopee.
In contrast, other ecommerce websites and platforms will require you to shell out several hundred to thousands of dollars to start out. With Shopee, all you need to do is set it up and get started.
For requirements, all you’ll need is a phone number and email address account. Creating a buyer account directly gives you a seller account!
If you aren’t sure how to go about it, don’t worry. We’ll go over the step-by-step instructions for setting up your Shopee account in the next section.
Steps on How to Sell on Shopee
Setting up a seller account on Shopee is very easy. However, please bear in mind that depending on where you are from and what Shopee website you go to, the process may vary slightly.
With that said though, the process is pretty straightforward with only minimal changes depending on your country of origin.
The first thing you need to do is head on over to the Shopee website. At the upper left side, you’ll find a button that says “Sell on Shopee”. Go ahead and click it.
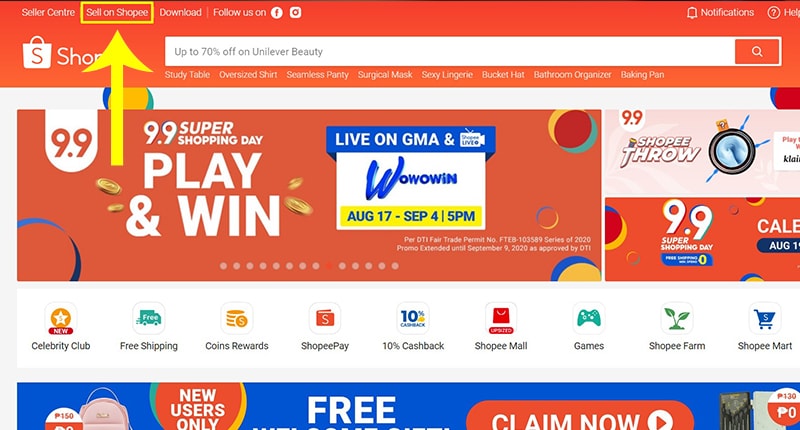
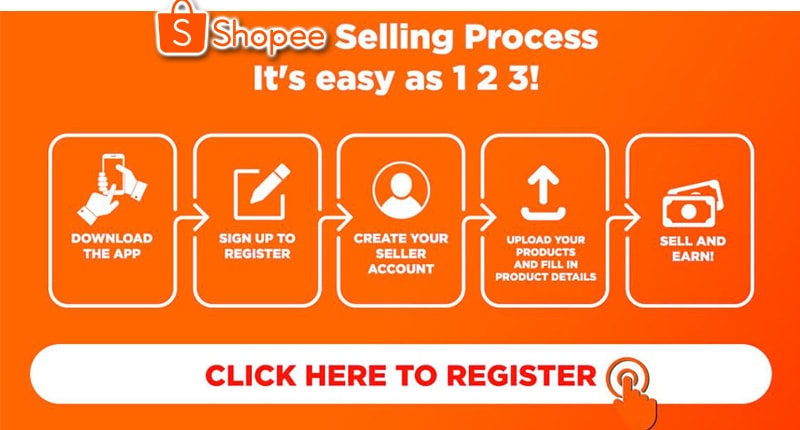
Once clicked, you will be taken to a page that contains a lot of information about selling on Shopee. It talks about the various benefits and even shows a simplified process for selling on the site.
Littered across the site, you’ll also be able to see a button that says, “Click Here to Register”. Other Shopee sites will have the button read, “Start Selling on Shopee Now!” You can’t miss it! Go ahead and click that to proceed to becoming a seller on Shopee.
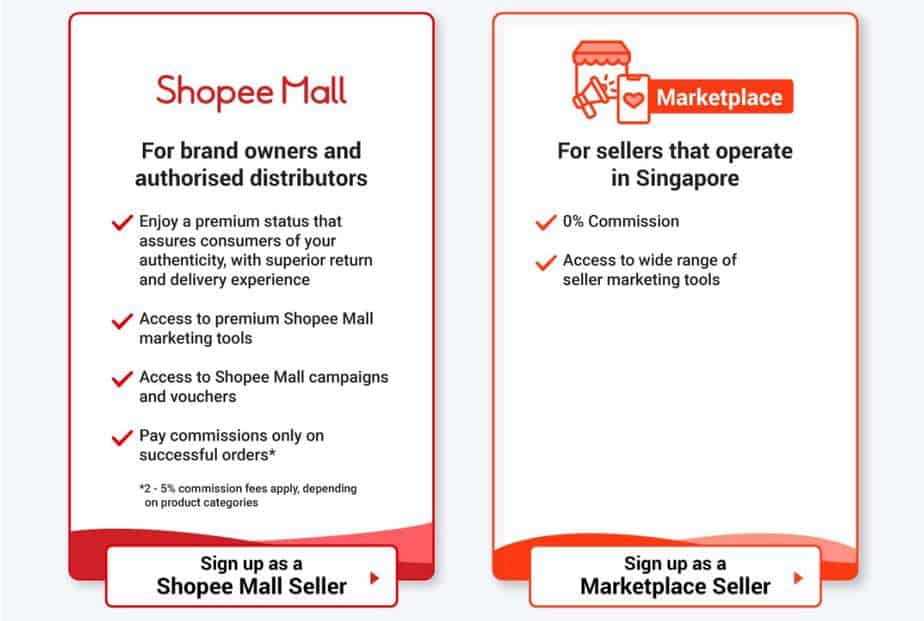
In other Shopee sites, you will need to decide on whether you will be signing up as a Shopee Mall Seller or as a Marketplace seller. The differences between the two can be seen below.
Other Shopee sites will lead you directly to a Google form page. It will ask you for several pieces of information such as your email address and whether or not you already have an existing shop on the platform already.

The questions in the registration process may also vary from country to country. In Singapore for instance, there are more questions asked in the Google form page. These include the category of your store, other platforms you have sold on before, and if you are a registered business or not.
Simply proceed with the forms and answer some more questions until they are all completed.
If you do not have an account yet, you will be directed to create one. If you do, you will need to fill in details regarding your store. If you are creating an account for the first time, all you need to do is input your phone number. A verification code will be sent there that you need to input.
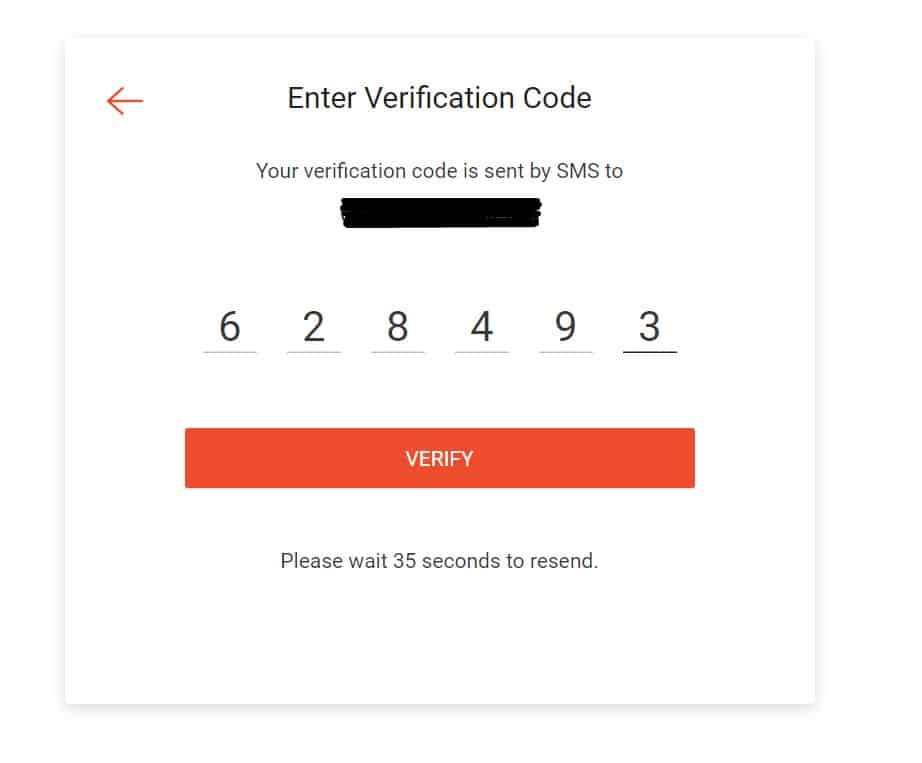
Once you input the verification code, you’ll need to set up your password too. Afterwards, you’ll officially have a Shopee account.
With your new Shopee account, you can start selling! Return to your Shopee site and click on the “Seller Center” button located on the top left part of your screen.

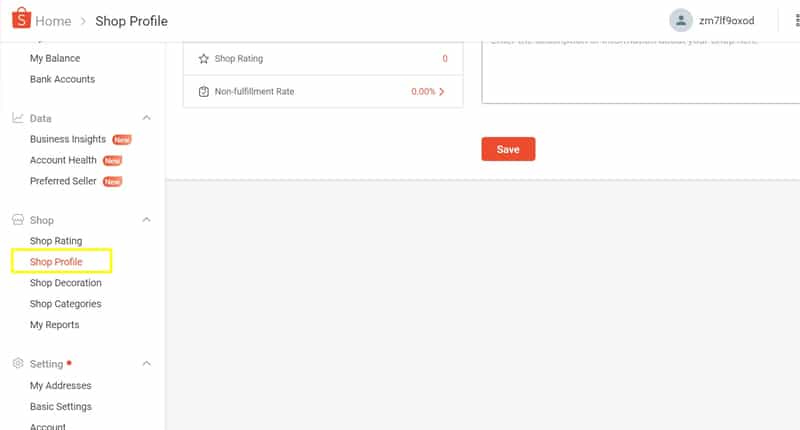
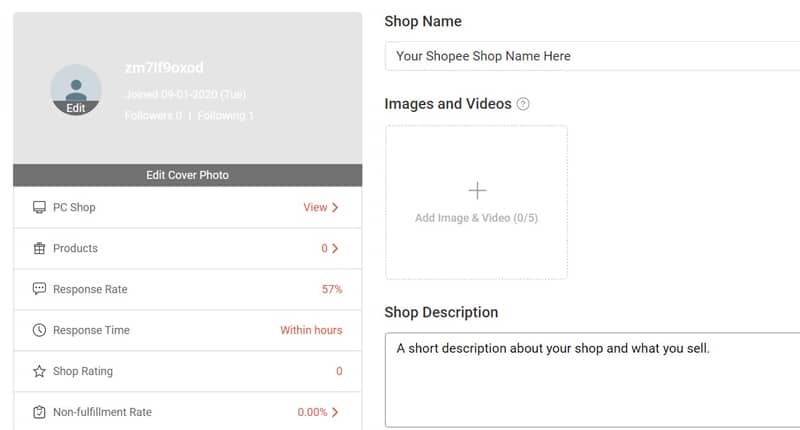
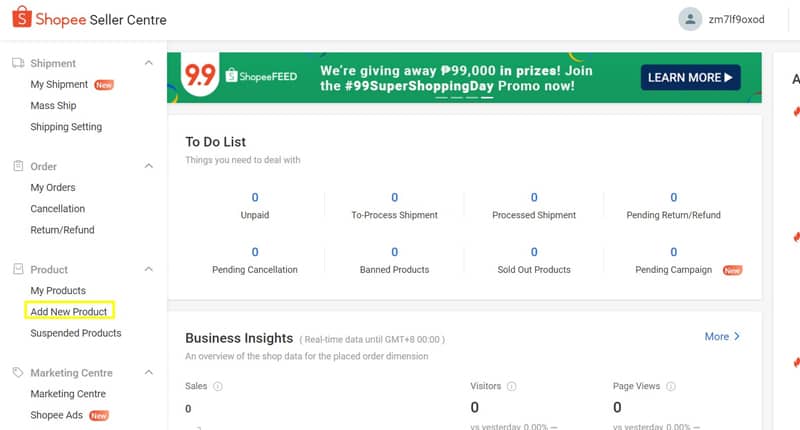
When you are all done, welcome to the shopping center. This is basically your base of operations for setting up your store. At the Seller Center’s home page, you’ll have access to a wealth of information. These include things like your to do list, business insights, a marketing center, your shop’s performance, and any penalties you may have incurred. We encourage you to explore the home page and check on the data here regularly. On the left side, you’ll see all the commands that you need to manage and check the status of your store. It also includes other commands that you may find useful. These include checking your shipments (if any), checking the status of your orders and cancellations or refunds, checking and adding your products, and much more. Check out of all these commands so that when you need to do or check something, you know exactly where to go. One of the first things that you need to check and complete is the “Shop Profile” area. Here, you’ll provide a name and description for your online shop on Shopee. This will also be the place to see some valuable information about your shop like the number of products you have, your response time, and your shop rating just to name a few.
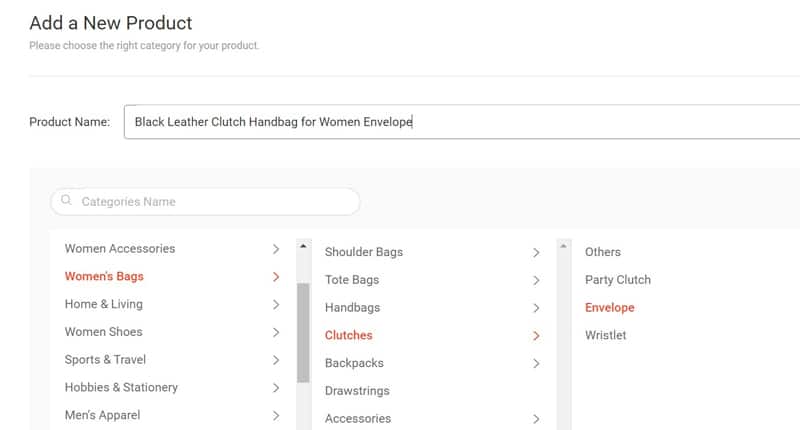
After the shop profile, you can start adding products. Do this by locating the “Add New Product” button on the left side.
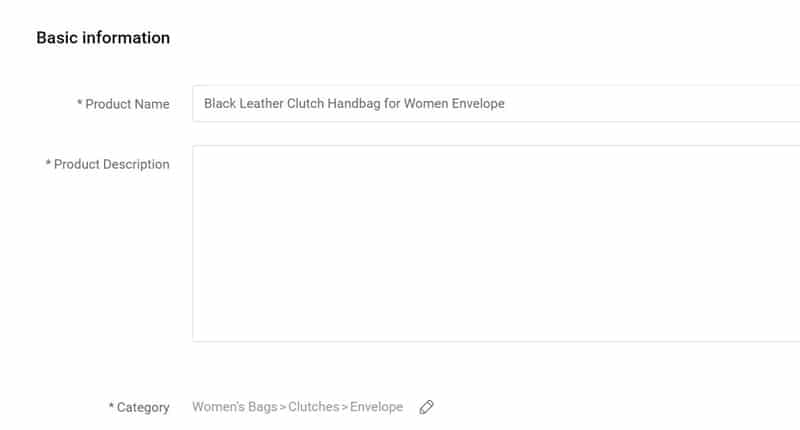
The layout is pretty intuitive when adding new products. You will need to input the product name and select categories for the item. Selecting the right categories will help people find this specific product better.
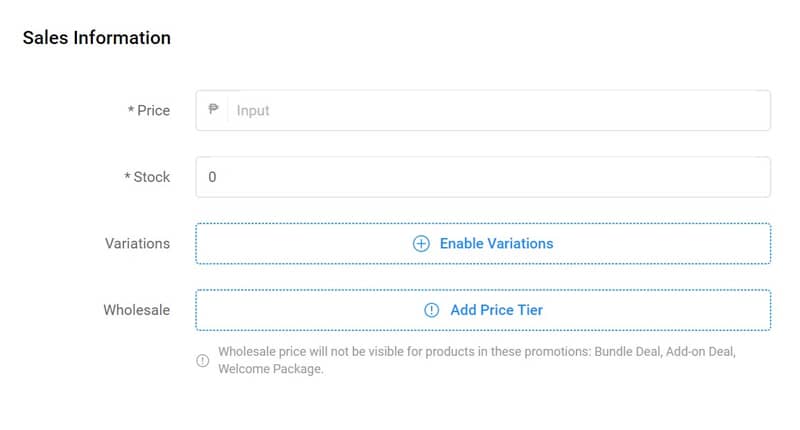
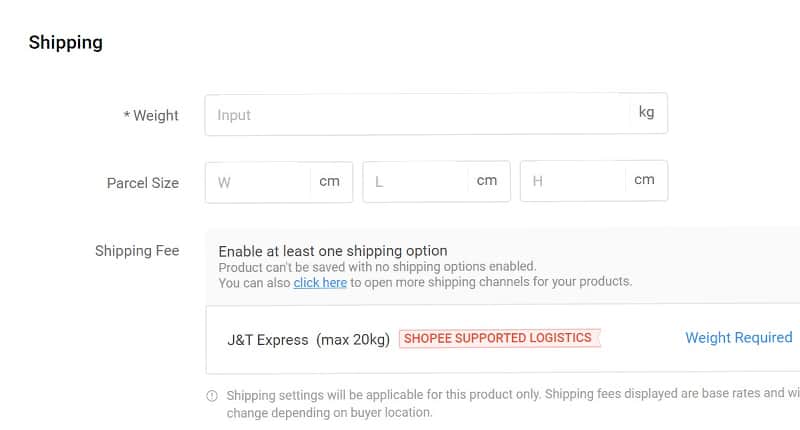
Once you are done with this, click next. The next you’ll need to do is flesh out more information of the product you’ll be selling. These include things like a product description, the brand, the price, images of the item, shipping information, and other important information.
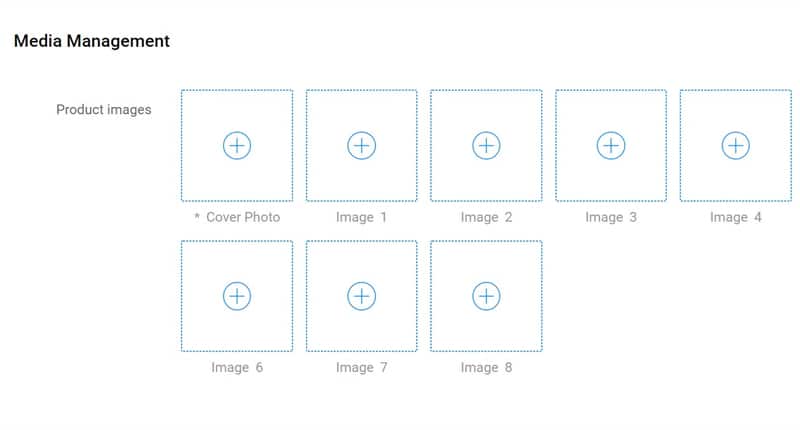

After you have filled in these pieces of information, don’t forget to click the “Save and Publish” button below.
And there you have it! You have just upped your first product to be sold. In terms of setting up your shop, this is it. You can now start to build your online shop on Shopee and earn some money.
There are many other tools that you can use at the seller center. We hope that you explore the options and understand what each one is for and does.
If you’d like to learn more about how to succeed in selling on Shopee, join the GFAVIP community now. This will allow you to connect with like-minded individuals and share tips and best practices that can help you succeed.
One of the things that can help you out is a recent podcast with Andy Lee that talks about opportunities in Southeast Asia, as well as differences of Southeast Asia ECommerce & Amazon.
If you’re looking for another platform or would like to diversify, we also have a guide on how to start selling on another great ecommerce platform, Lazada.
We wish you luck can’t wait to see your online shops grow!